The progression loop
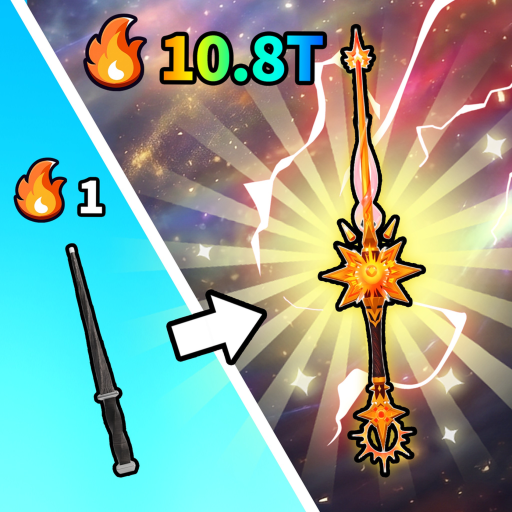
Every reliable route returns to the same loop: gain Power, test the Dungeon, choose Loot manually, convert unneeded items into Coins, improve one bottleneck, and use Rebirth to make the next rebuild faster. The route diagram above is a decision loop, not a complete Stage map.
Use three observable checks:
- Clear speed: can the current Wand and Power clear ordinary enemies without a long stall?
- Backpack pressure: are useful items being left behind because capacity fills too quickly?
- Level condition: does the Rebirth panel show that the next Level requirement is met?
From the first session to late game
| Phase | Current goal | Safe route | Move on when |
|---|---|---|---|
| First session | Establish the loop | Train, enter Dungeon, pick useful Loot, Return, Sell, and buy a practical Wand upgrade. | Ordinary enemies clear faster and the R1 Level 25 condition is approaching. |
| Early | Improve clear speed and capacity | Use Coins on the Wand bottleneck and bring back new Materials Index entries. | A Rebirth Level condition is met and rebuilding is repeatable. |
| Early → Mid | Add permanent multipliers | Rebirth, rebuild from Train, then repeat Wand, Materials Index, and Dungeon progress. | Observed runs rebuild faster and reach boss or higher-value areas more reliably. |
| Mid | Add Armor and Alchemy when useful | Keep Wand and capacity healthy, add Armor for Power gain, and brew only a Formula with a verified useful effect. | A deeper Dungeon loop remains stable without depending on one rare drop. |
| Late boundary | Optimize the current bottleneck | Compare clear speed, capacity, next upgrade cost, and next Rebirth Level. | Current evidence does not confirm a universal final Stage or endgame threshold. |
These phase names are editorial groupings. They are not official in-game labels and do not imply a fixed Power value or completion time.
First-session steps
- Find the Hub’s Train area and gain enough Power to test the first ordinary Dungeon enemy.
- Enter the Dungeon and clear the current area before moving forward.
- Pick up Loot manually. A clean Rebirth 0 sample showed
0/2; progressed accounts have shown more capacity, so treat two slots as an observed new-account sample rather than a permanent global value. - Prioritize a useful or first-time Index item when space is tight. Do not assume every rare-looking item is more valuable to progression.
- Use Return when the Backpack is full, clear speed collapses, or the run already holds something worth keeping.
- Sell items you do not need, then improve the Wand if it is the clear bottleneck.
- Open Index and claim only the milestone reward the UI actually shows.
- At Level 25, open Rebirth and verify the R1 panel before resetting.
Evidence note: the reviewed videos have different accounts, Rebirth counts, versions, cuts, and possible paid boosts. Their personal Power and Stage pace are not route requirements.
Upgrade order by bottleneck
Wand
Wand is the most direct early combat upgrade. One creator recommends the strongest affordable Wand; another skips a small upgrade to save for a larger one. Both routes reduce to one decision: upgrade now when clear speed is already poor, or save while the current Wand still clears quickly.
The sources show several Wand names, but they do not provide a complete current price-and-Power table suitable for publication here.
Materials Index and Backpack
Index contains Materials and Potions sections. A clear Materials Index sample showed Backpack capacity increasing from 4 to 5. Another observed Index claim gave movement speed, so not every milestone should be described as capacity.
The specific Potions Index reward sequence is still unconfirmed. Do not tell players that crafting any Potion automatically expands the Backpack.
Armor
Armor cards show a Power multiplier and can improve training gains. It is usually a later upgrade because the early route first needs a workable Wand and enough capacity to bring useful Loot home.
The often-repeated “100K Coins per run” Armor timing comes from one creator’s route. It is not an unlock condition or a universal profitability threshold.
Alchemy and Potions
Alchemy converts Dungeon materials through fixed Formulas. Star a target Formula, find the highlighted materials, pick them up manually, brew, wait, and claim the result. Some Formulas show Rebirth locks.
Potion duration, consumption, permanence, and reuse rules vary or remain unverified. Check the specific Potion before spending materials; do not generalize one Potion’s behavior to all of them.
Rebirth 1–5 checkpoints
The panel’s After values are the total multiplier after completing that Rebirth, not an additional multiplier applied again.
| Rebirth | Level | Power total | Coins total | Route use |
|---|---|---|---|---|
| R1 | 25 | x1.5 | x1.2 | Begin the permanent multiplier loop. |
| R2 | 50 | x2 | x1.4 | A reviewed run showed access to a new training area after two Rebirths. |
| R3 | 75 | x2.5 | x1.6 | Keep balancing clear speed and capacity during the faster rebuild. |
| R4 | 100 | x3 | x1.8 | Bring Armor and verified Potion choices into mid-game decisions. |
| R5 | 125 | x3.5 | x2 | Current confirmed table boundary; do not extrapolate R6. |
Clear before/after footage confirms that Level and current Power reset. Coins, Rebirth count, Backpack capacity, and the equipped Wand remained in the observed samples. The available progression sources do not prove a complete retention matrix for Loot, Index state, materials, or Skills.
Stage and boss evidence limits
The Dungeon progresses through numbered Stages, and the current enemies must be cleared before moving forward. The sources show ordinary areas and named bosses, but they do not support a complete Stage order, universal Required Power table, equipment minimum, or current maximum Stage.
Two clear videos show the Dwarf King at Stage 4 with different HP values. That conflict may reflect version, account, server, or scaling differences; this page therefore treats Stage 4 as an observed boss checkpoint and does not publish either HP value as universal.
When a boss blocks progress:
- Leave the attempt rather than copying the source player’s Power.
- Decide whether the real problem is clear speed, capacity, Power gain, or a missing Formula effect.
- Change one item—Train, Wand, Materials Index capacity, Armor, or a verified Potion.
- Retry the same boss so the result is comparable.
Troubleshooting
| Symptom | Check | Next action |
|---|---|---|
| Ordinary enemies are slow | Train area and Wand | Train, then buy the next Wand only if the current one remains the bottleneck. |
| Coins grow slowly | Value brought home and capacity | Stop filling every slot with low-value repeats; collect a missing Materials Index entry when useful. |
| Backpack fills immediately | Materials Index gaps | Bring back first-time materials and claim the exact displayed milestone reward. |
| Rebirth feels weaker | Whether you compared at zero Power | Rebuild from Train and compare a complete run with the permanent total multipliers. |
| Formula is locked | Rebirth text below the Formula | Meet the displayed Rebirth condition instead of guessing that the feature is broken. |
| Armor did not fix progress | Wand and capacity | Armor improves Power gain; it does not replace a weak Wand or small Backpack. |
Frequently asked questions
Should Wand or Armor come first?
Wand usually comes first because it directly improves Power gain and Dungeon clear speed. Materials Index capacity is the parallel early priority. Add Armor when income is stable enough that it does not stall multiple runs.
Does Rebirth use Power or Level?
It uses Level. R1–R5 clear panels show Level conditions of 25, 50, 75, 100, and 125.
Do Coins disappear during Rebirth?
The reviewed before/after footage shows Coins remaining. One creator guessed they would reset, but the same recording’s UI contradicts that statement.
What is the maximum Stage and Required Power for each area?
The current source set does not confirm a complete table. Video titles, door-adjacent numbers, and one player’s current Power are not enough to publish universal Stage requirements.
Why does Alchemy matter for progression?
Dungeon materials feed fixed Potion Formulas, and some Formulas are Rebirth-gated. Alchemy therefore changes which materials should be kept, but a Potion should enter the route only after its effect and use rules are verified.
Sources and verification
This article was assembled from the official Roblox experience page and reviewed gameplay footage published from Aug 6–11, 2026. Clear UI panels take priority over creator narration when they conflict.
- Official Magic Loot experience on Roblox
- Radex Tips beginner guide — source link only; its Rebirth Power statement is contradicted by Level panels.
- nValid Stage 27 run — used for UI checks, not as proof of a maximum Stage.
- NoobBlox guide — R1/R5, Index, equipment, and Alchemy UI.
- ItzVexo guide — Formula tracking, equipment, and route suggestions.
- ItsChalls guide — R2 before/after and the Coins narration/UI conflict.
- VendoPlus Rebirth guide — R3/R4 Level and multiplier panels.
No third-party video frames are published on this page. The route diagram is an editorial summary of the confirmed loop, not a gameplay screenshot or a claim about the complete Dungeon map.