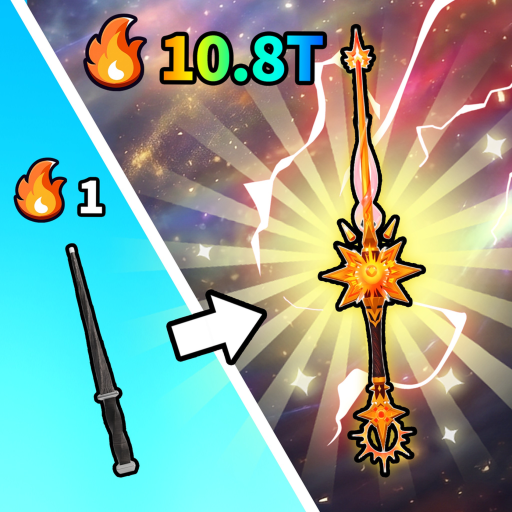
Choose the route that fits the bottleneck
There is no verified single best Money Farm Stage. Choose a route from the limitation that is costing the current run the most Loot or time.
| Route | Use it when | Main return | Leave it when |
|---|---|---|---|
| Early — Wand loop | A new or low-Rebirth account cannot clear ordinary enemies quickly. | Sell selected Loot, buy a stronger affordable Wand, and reach higher-value areas more reliably. | Backpack capacity wastes more of the run than clear speed. |
| Mid — Index loop | Early Stages are repeatable but a small Backpack forces frequent Returns. | Claim confirmed Index milestones and use added slots to carry more useful Loot. | The remaining Index gaps depend on rare items or difficult Potion entries. |
| Push — high ground | A harder map has reachable terrain that enemies cannot climb while ranged attacks still connect. | A chance to defeat higher-HP enemies and compare their Loot without taking normal melee pressure. | Enemies can hit you, Return is restricted, or each kill takes too long. |
The phase names above are route labels, not official in-game stages. A higher Stage is not automatically more profitable if its enemies make each run much slower or less reliable.
The repeatable Coin loop
Current gameplay evidence supports this loop:
- Use the Training area beside the main Dungeon to gain Power.
- Enter the Dungeon once ordinary enemies are practical to defeat. Clear the current area before moving forward.
- Pick up Loot manually when the
E Pick upprompt appears. The game does not automatically collect nearby drops. - Return when the Backpack is full, the run reaches its stable limit, or the character is defeated.
- In the Hub, review anything needed for Index or Alchemy, then use Sell or Sell all for unneeded Loot.
- Put early Coins into a practical Wand upgrade, then repeat the Training and Dungeon loop.
- When the displayed Rebirth condition is met, Rebirth for permanent Power and Coins gains and rebuild through the same loop.
The visible route converts enemy drops into Coins by selling Loot. The reviewed footage does not prove that ordinary enemies directly award Coins, so this guide does not count unseen or dynamic rewards as stable Money Farm income.
Pick-up priority with a small Backpack
Use each slot deliberately instead of taking the first drop on the ground.
- First-time Index item: pick up an item that is still missing from Index at least once. Some collected-item and Potion milestones can add Backpack slots, giving later runs more carrying capacity.
- Tracked Alchemy material: keep materials required by the Formula you have starred. Footage shows this route with materials including Golden Tooth and Goblin Finger.
- Higher visible ground value: after Index and Formula needs are covered, compare the English item name, rarity, and Coins number shown above nearby drops.
- End a full run: once the Backpack is full and no useful swap is confirmed, Return instead of waiting in a low-value area that cannot add another item.
The Coins number shown above ground Loot is useful for comparing candidates within a run. It has not been audited against the Coin balance before and after selling, so it is not published here as guaranteed final income. The exact starting Backpack capacity is also excluded because the reviewed narration and UI conflict.
Route A: Early Wand loop
Prerequisite: a new or low-Rebirth account; no special item is required.
- Train beside the main Dungeon, then test the current ordinary enemy.
- Enter only as deep as the account can clear consistently.
- While capacity is tight, take first-time Index items, tracked Formula materials, or the strongest remaining visible value.
- Return when full, defeated, or stalled at the practical end of the run.
- Check materials before using Sell all.
- Buy a stronger Wand that is currently affordable when clear speed is the main bottleneck.
- Repeat, then Rebirth when the displayed condition is met.
A Wand is the clearest early Coin investment in the reviewed guides because it helps defeat enemies and reach deeper areas. The sources do not provide a complete current Wand price, Power, or optimal purchase table, so “strongest affordable” remains creator strategy rather than a required order.
Route B: Mid-game Index loop
Prerequisite: the account can repeat the early Dungeon but Backpack slots still cut runs short.
- Open Index and note missing Loot and Potion entries.
- During a run, take a missing entry even when another item shows a higher ground value.
- For a Potion entry, star its fixed Alchemy Formula and keep the matching materials.
- After returning, claim only the completed milestone reward the UI shows.
- Use any added Backpack slots to carry more useful Loot before returning.
- Switch back to value-first farming when the remaining Index gaps are rare or costly to complete.
This route trades one short-term sale for long-term capacity. Evidence supports capacity gains from Index progress, but it does not establish the exact reward order for every Materials or Potions milestone.
Route C: Version-limited high-ground push
Prerequisites: the target map has high terrain the player can reach but enemies cannot, and a ranged attack can still hit from that position.
- Enter a Stage that is harder than the account’s normal loop but where attacks still deal useful damage.
- Inspect rocks, ledges, or platforms before drawing every nearby enemy.
- Confirm the character stands securely and enemies cannot reach the position.
- Attack from range, then choose drops by Index need, Formula need, and visible ground value.
- Abandon the route if enemies can connect, the map lacks suitable terrain, Return becomes unavailable, or kills take too long.
Two independent videos show this method, but both treat it as map-dependent and vulnerable to an update. It is not a permanent exploit, a zero-risk route, or proof that every harder Stage yields better Coins per minute.
Upgrade and system tradeoffs
| System | Money Farm role | When to prioritize | Evidence limit |
|---|---|---|---|
| Wand | Improves combat progress and access to higher-value areas. | Early, when ordinary enemies clear too slowly. | No complete current price-and-Power table. |
| Index | Milestone rewards can expand Backpack capacity. | Early and mid game, when useful Loot is left behind. | Starting capacity and the full reward sequence are not confirmed. |
| Armor | Cards show a multiplier for Power gain. | After Wand and Backpack form a stable loop. | One creator uses over 100,000 Coins per run as an Armor reference point; it is not an unlock condition or universal threshold. |
| Alchemy | Turns specific enemy materials into Potions and can contribute to Index progress. | When a fixed Formula has a verified useful goal. | There is no complete keep-or-sell table for every material. |
| Rebirth | Resets current Power for permanent Power and Coins gains. | When the panel’s condition is met, after checking any nearby short goal. | No equal-time test proves a more profitable waiting formula. |
| Broom | Speeds travel through already-cleared Dungeon ground. | Use it when already owned; it is not a route prerequisite. | No timing comparison quantifies the saving. |
Sell order and run reset
Use this order when returning to the Hub:
- Check whether the run completed a new Index entry or milestone.
- Separate any material needed by the Formula you are actively following.
- Review the remaining Loot for sale.
- Use Sell or Sell all only after that check.
- Spend Coins on the bottleneck that changes the next run—usually Wand early, then capacity or Armor as the route stabilizes.
The footage confirms a Sell all action but does not clearly confirm a material lock, an exclusion system, or every single-item selling control. Do not assume Sell all automatically protects Potion ingredients.
Avoid these farming traps
- Do not fill a small Backpack with every repeated drop. Decide whether the run is for Index, a Formula, or Coins.
- Do not use rarity alone. Compare visible value and check whether the item is new to Index or needed by Alchemy.
- Do not use Sell all without checking tracked materials first.
- Do not upgrade only the Wand while capacity forces constant Returns.
- Do not spend every early Coin on Armor. The current evidence supports a working Wand and Backpack loop first.
- Do not assume a deeper Stage pays more per minute. Slow kills and failed runs can erase the apparent gain.
- Do not treat one Legendary or Mythic drop as an average return.
- Do not treat
BEST,FAST, orfastestin a creator title as measured evidence.
Frequently asked questions
How do you get Coins in Magic Loot?
The stable route shown in current footage is to defeat enemies, pick up Loot manually, Return to the Hub, and sell unneeded items. Dynamic rewards were visible in some footage, but their current contents and timing are not confirmed as permanent income.
Should I pick the most expensive Loot or a missing Index item?
When capacity is still small, take a missing Index item at least once because milestone progress can expand the Backpack. With more capacity, dedicate more slots to higher visible-value Loot. A material needed by the Formula you are following remains a separate priority.
Should I buy a Wand or Armor first?
Use a Wand first when combat speed is the bottleneck, while also improving Index capacity. Armor is a more expensive mid-game node. The creator suggestion to wait until runs exceed 100,000 Coins is a reference point, not a system requirement.
Does Sell all protect Potion materials?
The current evidence does not clearly show a lock or exclusion rule. Check any material needed for the tracked Formula before using Sell all; do not rely on automatic protection.
Is high-ground farming permanent?
No. It works only where suitable terrain prevents enemies from reaching the player while ranged attacks still connect. The route may change or disappear after an update.
What is the best Money Farm Stage?
No Stage can currently be named from reproducible evidence. A useful comparison would need complete run time, kill time, total Loot brought home, Return and selling time, and failure rate. The available videos do not provide that continuous test.
Verification boundary
This guide separates visible UI facts from creator strategy. It does not publish Coins per minute, hourly income, a best Stage, exact starting Backpack capacity, final sell values, drop rates, a full equipment payback table, or a guaranteed high-ground location because the reviewed evidence cannot support those claims.
Sources and verification
The routes were checked against the official Roblox experience and gameplay footage published from Aug 7–10, 2026. UI actions support the core loop; creator buying and route suggestions remain advice. No third-party frames or videos are published on this page.
- Official Magic Loot experience on Roblox — confirms the target game and its Train, Boss, Loot, Upgrade and Rebirth, and Potion loop.
- Radex Tips beginner guide — core loop, manual pickup, Sell, Wand, Index, Alchemy, Armor timing advice, and Rebirth.
- Ricoko Tutorial & Showcase high-ground method — short map-dependent route and its version warning.
- ItzVexo Magic Loot guide — Sell all, Formula tracking, material choices, Index items, and upgrade suggestions.
- NoobBlox Magic Loot guide — Training, Wand, selective pickup, Index, Armor, Broom, and reward UI.
- Radex Tips Money Farm method — independent support for the high-ground route and update risk.